ClapMove · clapmove.com
Exercise handout — move better, feel better.
Kettlebell Windmill With Free-Hand Leg Slide
Hold a kettlebell locked out overhead with the feet turned out. Shift the hip to the side and slide the free hand down the leg toward the floor, eyes on the bell.
Stop if
Choose an easier exercise if pain reaches 6 out of 10 or becomes sharp. Stop and rest if pain reaches 8 out of 10.
This is the general ClapMove rule. This exercise has no extra stop rule of its own.
- Pain 6 out of 10 or more: choose an easier exercise.
- Pain 8 out of 10 or more: stop and rest.
Equipment needed
- Works at home
- Works at the gym
kettlebells
Home Options
- kettlebell
Dosage
3
Sets
8
Reps / Time
60 sec
Rest
controlled
Tempo
Step-by-Step Guide
Set up
- Stand with the kettlebell pressed overhead in one straight arm.
- Turn the feet 45 degrees away from the bell arm.
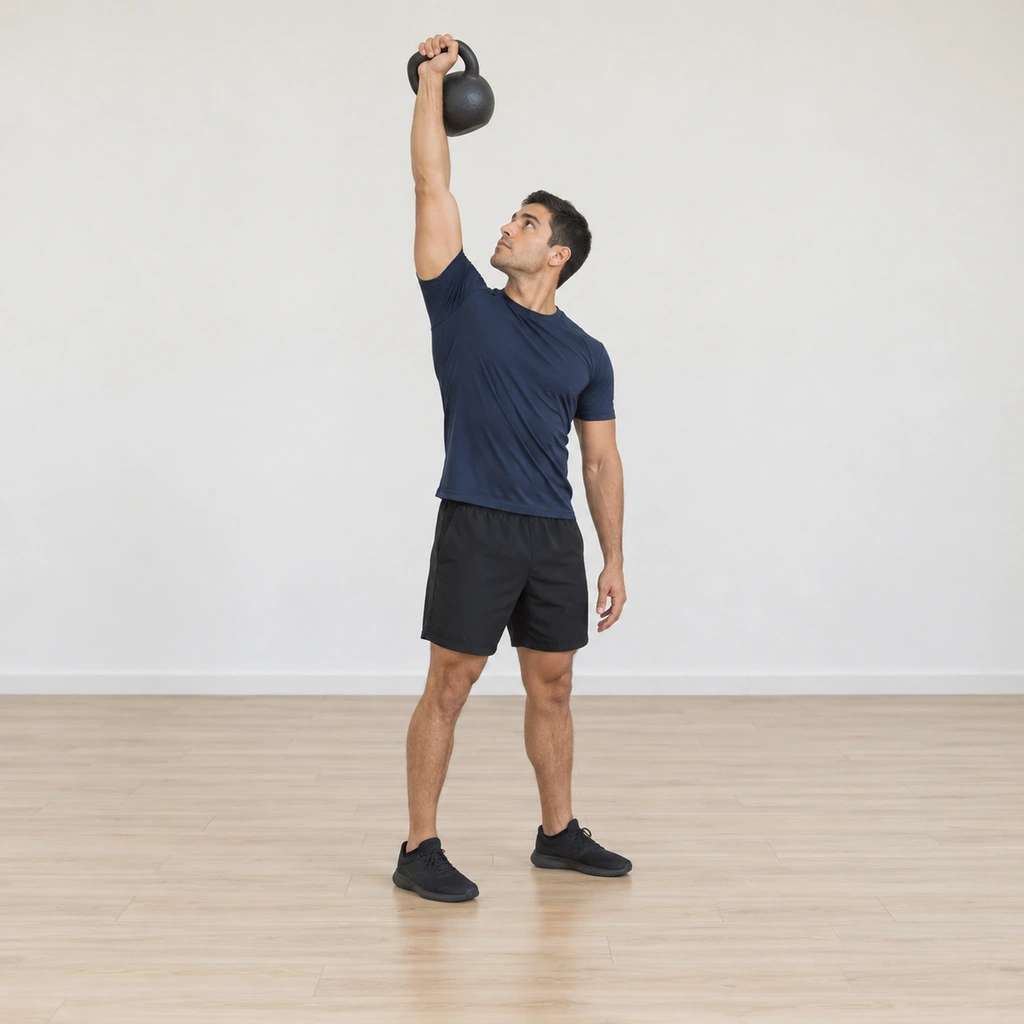
Step 1 of 5
Extend the bell arm straight overhead and turn the feet 45 degrees away.
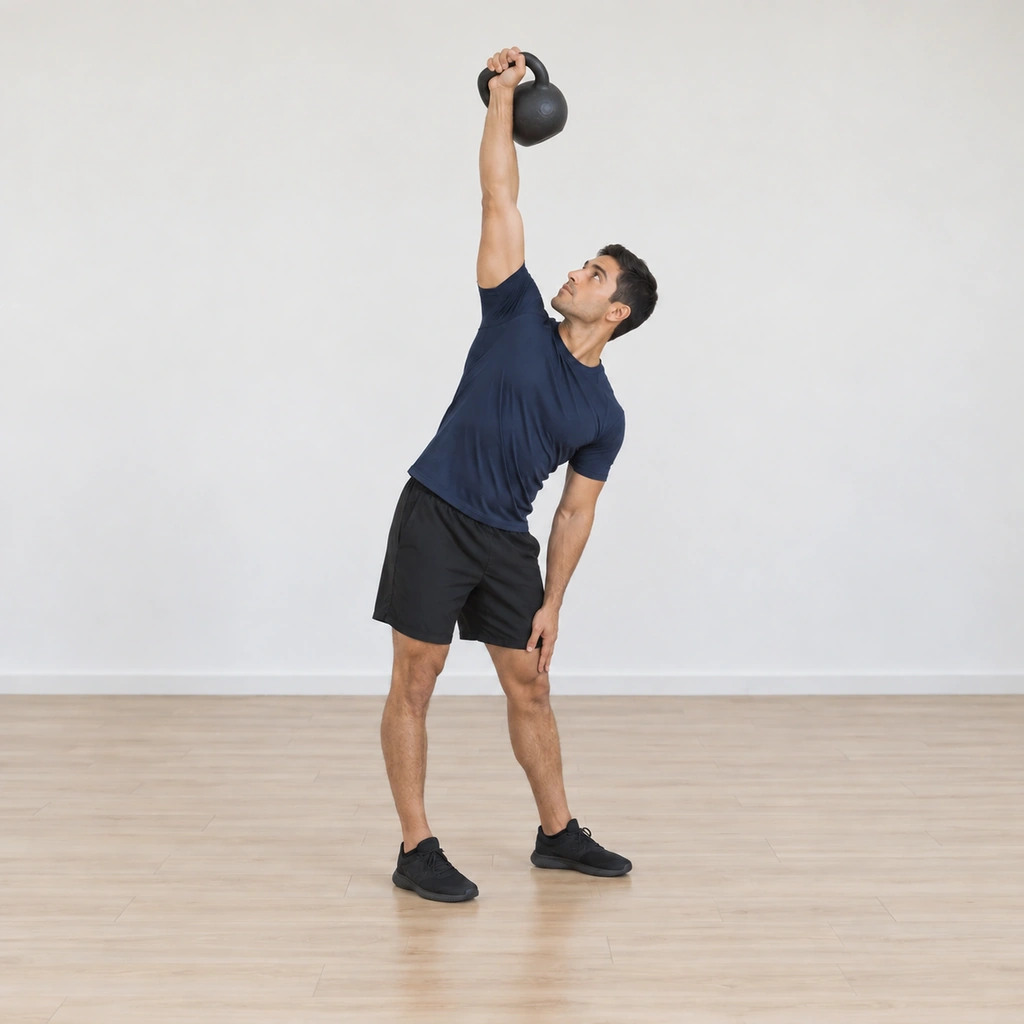
Step 2 of 5
Shift the hip to the side and begin the bend.
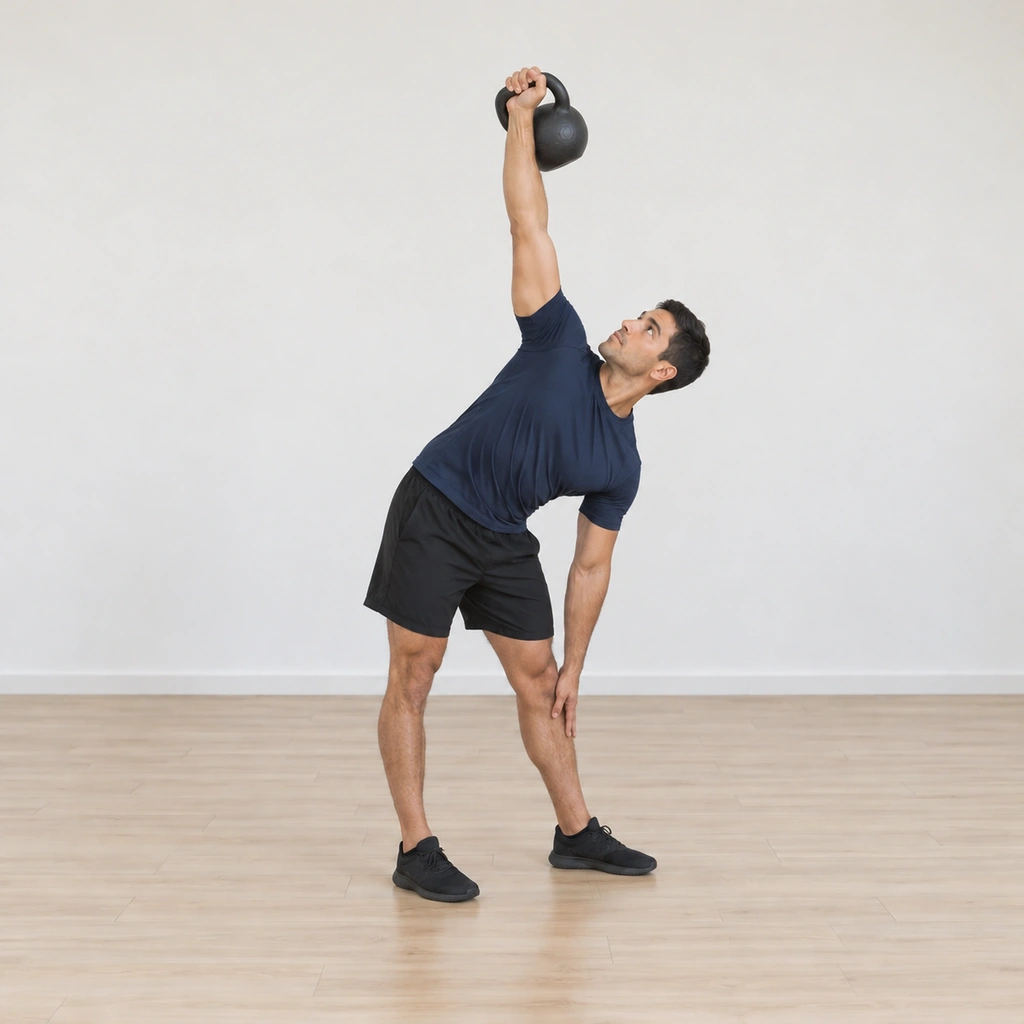
Step 3 of 5
Slide the free hand down the leg toward the floor, eyes on the bell.
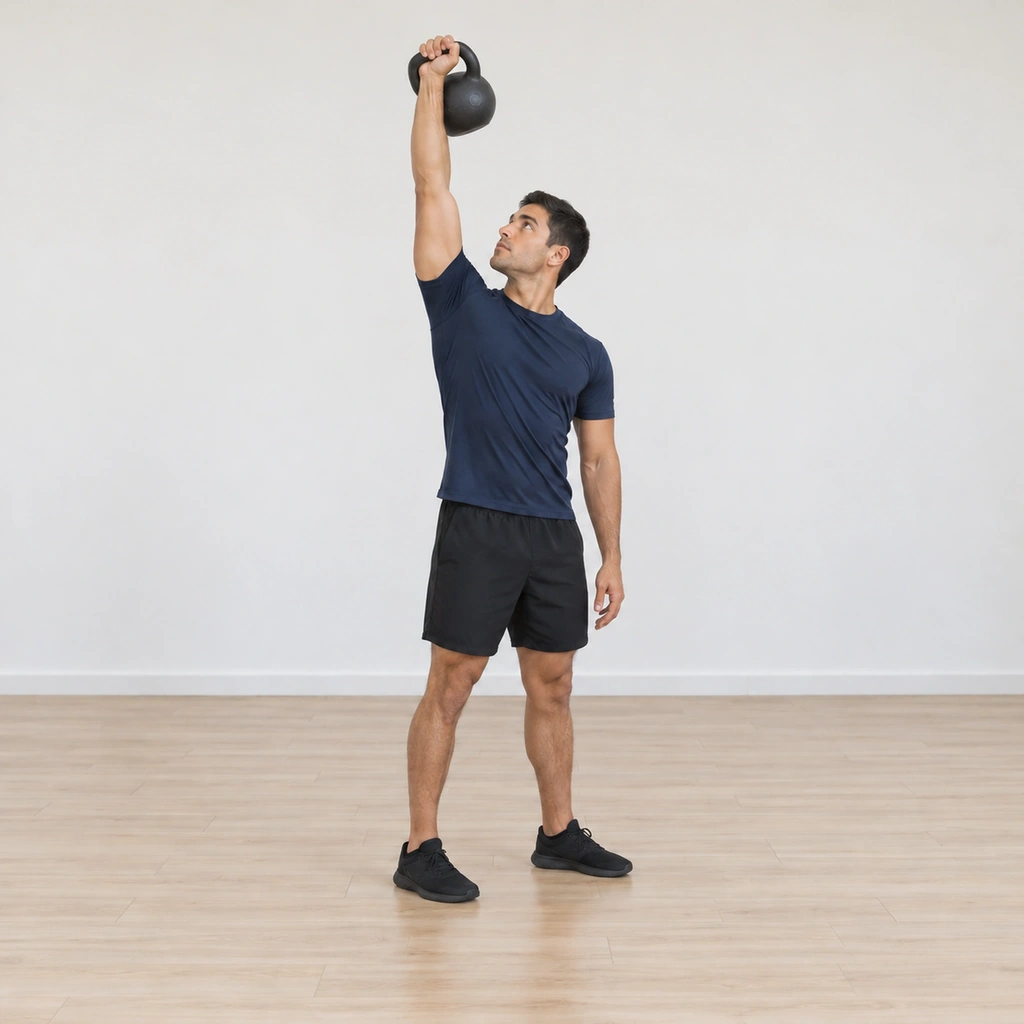
Step 4 of 5
Drive back up to standing with the bell still locked.
Step 5 of 5
Extend the bell arm straight overhead and turn the feet 45 degrees away.
Safety Information
Keep the bell arm locked and vertical throughout; the bend comes from the shifted hip, not from leaning the shoulder. Anyone with a shoulder, elbow, wrist, hip, back or balance problem should ask a physical therapist or physician before attempting this exercise and stop at pain or dizziness. The eyes stay on the kettlebell; move slowly enough to keep the bell stacked. Stop if the exercise causes pain or you become unwell. Seek appropriate professional advice about symptoms or suitability.
Get your free personalized program at clapmove.com/register
Printed from clapmove.com. ClapMove is not a replacement for professional medical advice — always consult a healthcare provider before starting any exercise program.