ClapMove · clapmove.com
Exercise handout — move better, feel better.
Ab Wheel Knee Tucks
Start in a high plank with both feet in the cradles of an ab wheel. Pull both knees toward the chest so the wheel rolls in, then extend the legs back.
Stop if
Choose an easier exercise if pain reaches 6 out of 10 or becomes sharp. Stop and rest if pain reaches 8 out of 10.
This is the general ClapMove rule. This exercise has no extra stop rule of its own.
- Pain 6 out of 10 or more: choose an easier exercise.
- Pain 8 out of 10 or more: stop and rest.
Equipment needed
- Works at home
- Works at the gym
Home Options
- ab wheel
Dosage
3
Sets
8
Reps / Time
60 sec
Rest
controlled
Tempo
Step-by-Step Guide
Set up
- Set both feet into the wheel's foot cradles.
- Take a plank position with the hands on the floor.
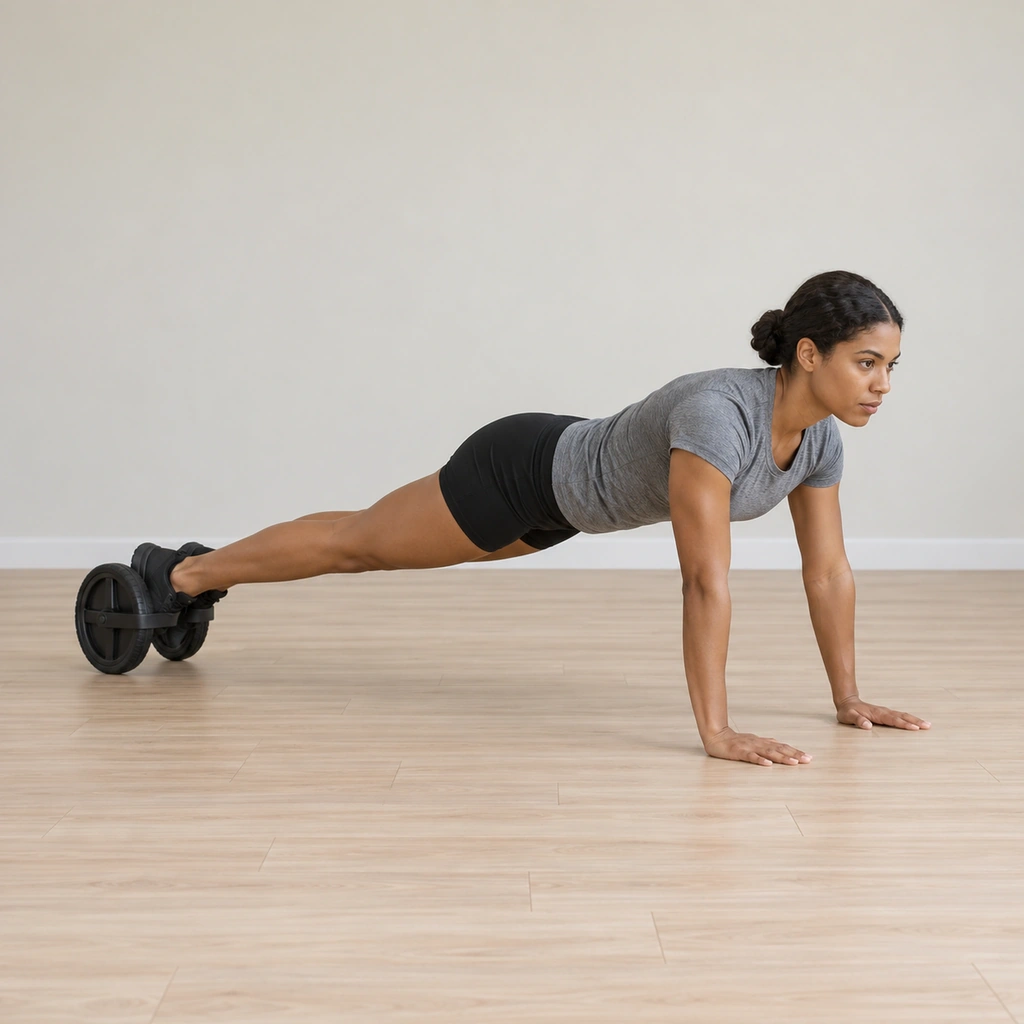
Step 1 of 5
Set both feet into the wheel's foot cradles and take a plank position.
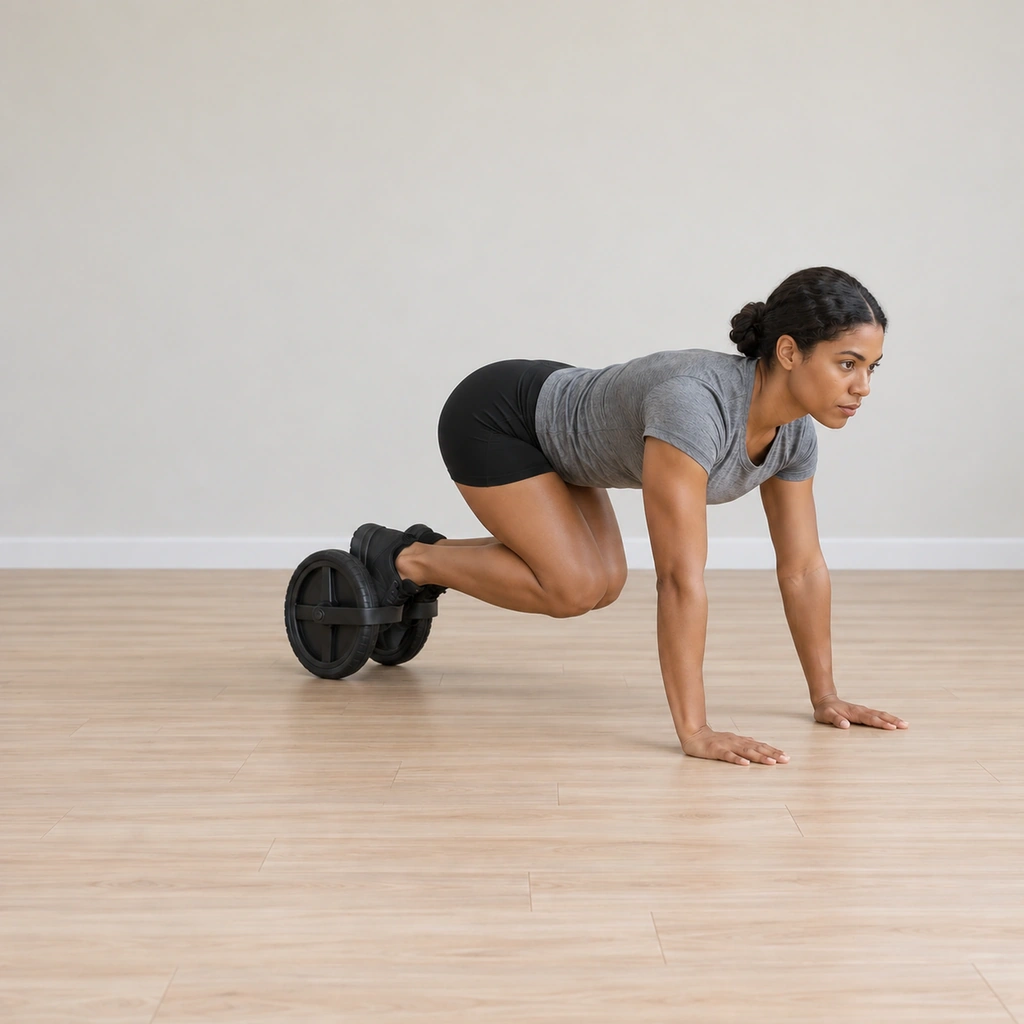
Step 2 of 5
Pull the knees toward the chest.
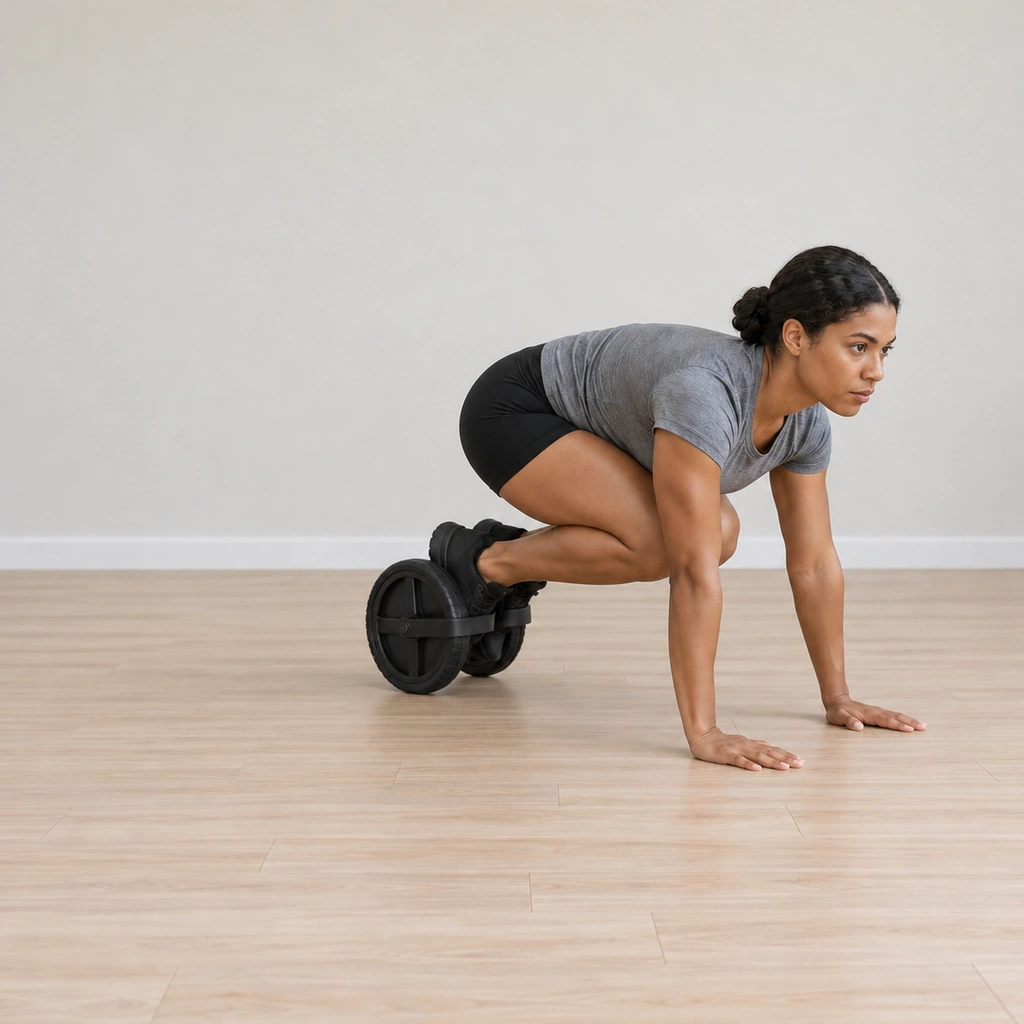
Step 3 of 5
Draw the knees fully in at the chest.
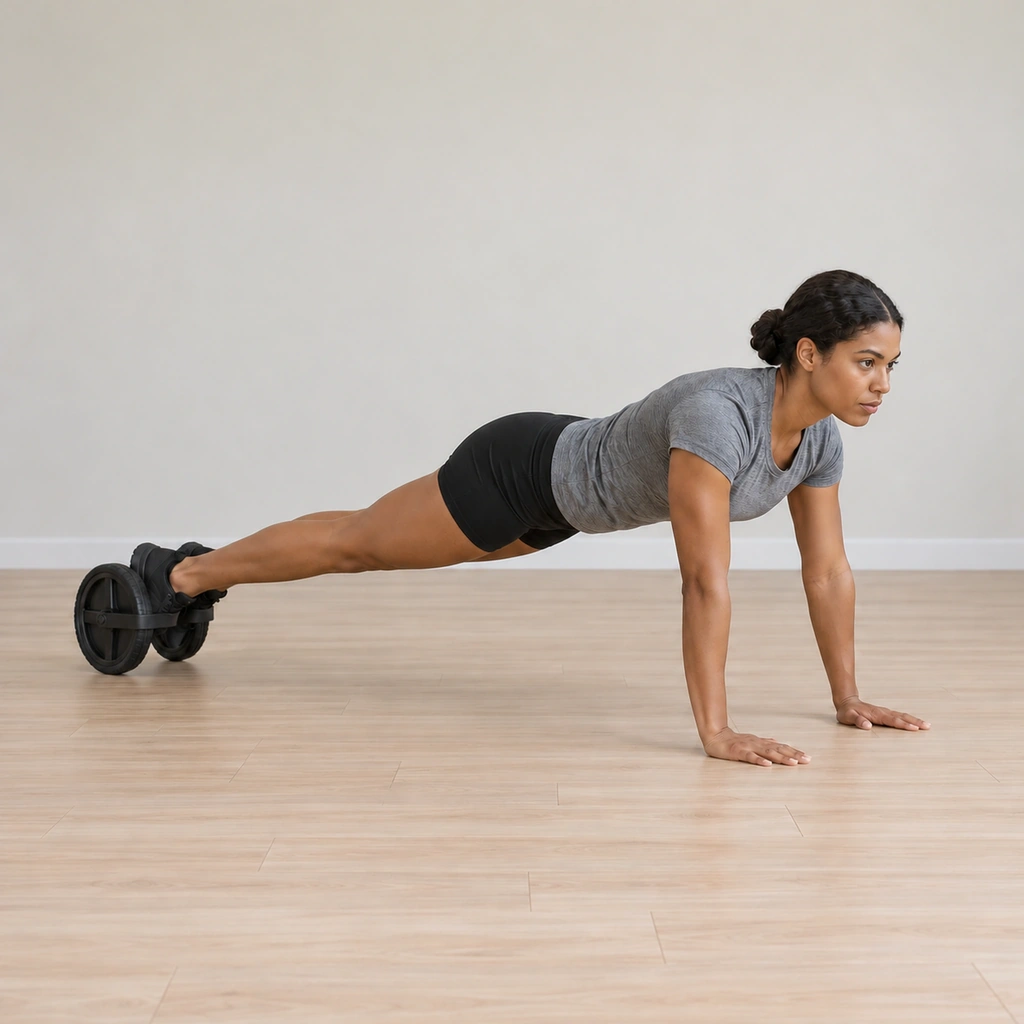
Step 4 of 5
Extend the legs and roll back to the plank.
Step 5 of 5
Set both feet into the wheel's foot cradles and take a plank position.
Safety Information
Keep the chest lifted and push through the midfoot and heel. Keep the knees tracking in line with the toes through the tuck. Anyone with a shoulder, elbow, wrist, hip, back or balance problem should ask a physical therapist or physician before attempting this exercise and stop at pain or dizziness. Stop if the exercise causes pain or you become unwell. Seek appropriate professional advice about symptoms or suitability.
Get your free personalized program at clapmove.com/register
Printed from clapmove.com. ClapMove is not a replacement for professional medical advice — always consult a healthcare provider before starting any exercise program.